Monday, July 9, 2012

How to make your own Hoosier Patties!


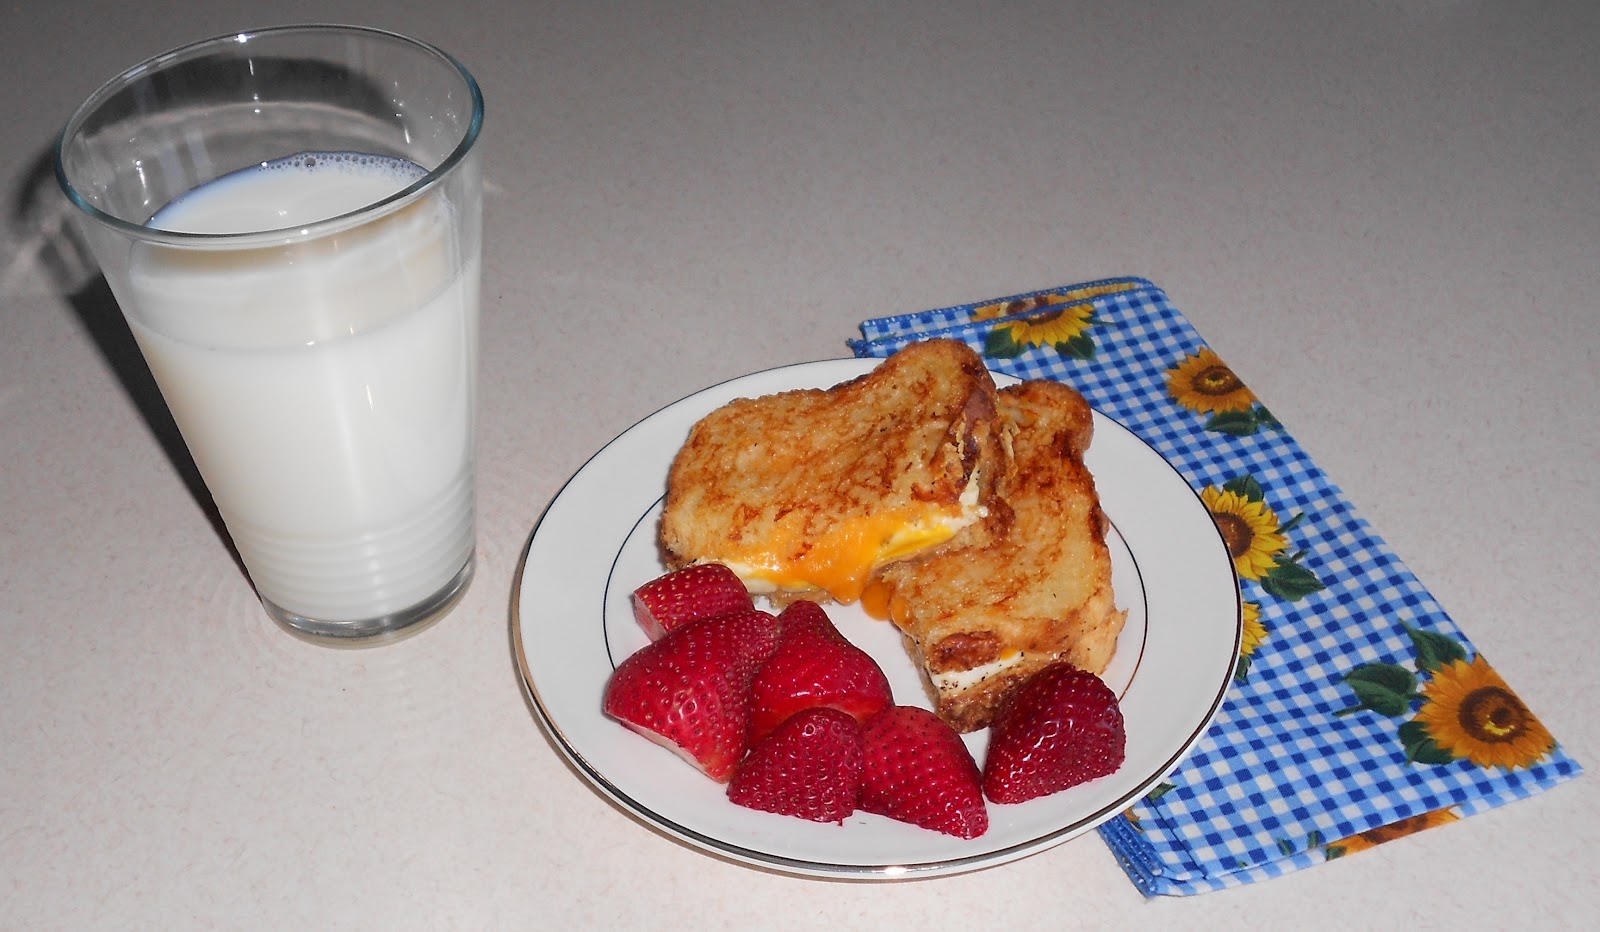
What is a Hoosier Pattie?  Well these patties are probably not the ones you are thinking of…Moo!  A Hoosier Pattie is a combination of a food I loved growing up as a kid and a newfound food from my most recent travels.  I grew up in a small town in Michigan, Brighton, and not only did I have family in the area, but also in the U.P. (Upper Peninsula) – Sault Ste. Marie to be exact.  So having roots in the U.P., we kids were exposed to foods you just don’t find in Indiana – one of them being Pasties (a meat & root vegetable pie).  I remember these fondly and looked forward to the times when Mrs. Paulsen, a neighbor from down the street (also a U.P. native) would make these delicious pies and send a batch up the street for us to enjoy!  She did this quite often; she was like another Grandmother to us kids.

I recently took my first Cruise of the Western Caribbean, with one of the ports of call being Ocho Rios, Jamaica.  Talk about a country rich in foodie flavors – Jerk Chicken, Jamaican Coffee and what I have come to crave, the Jamaican Patties.  These are similar to the meat 
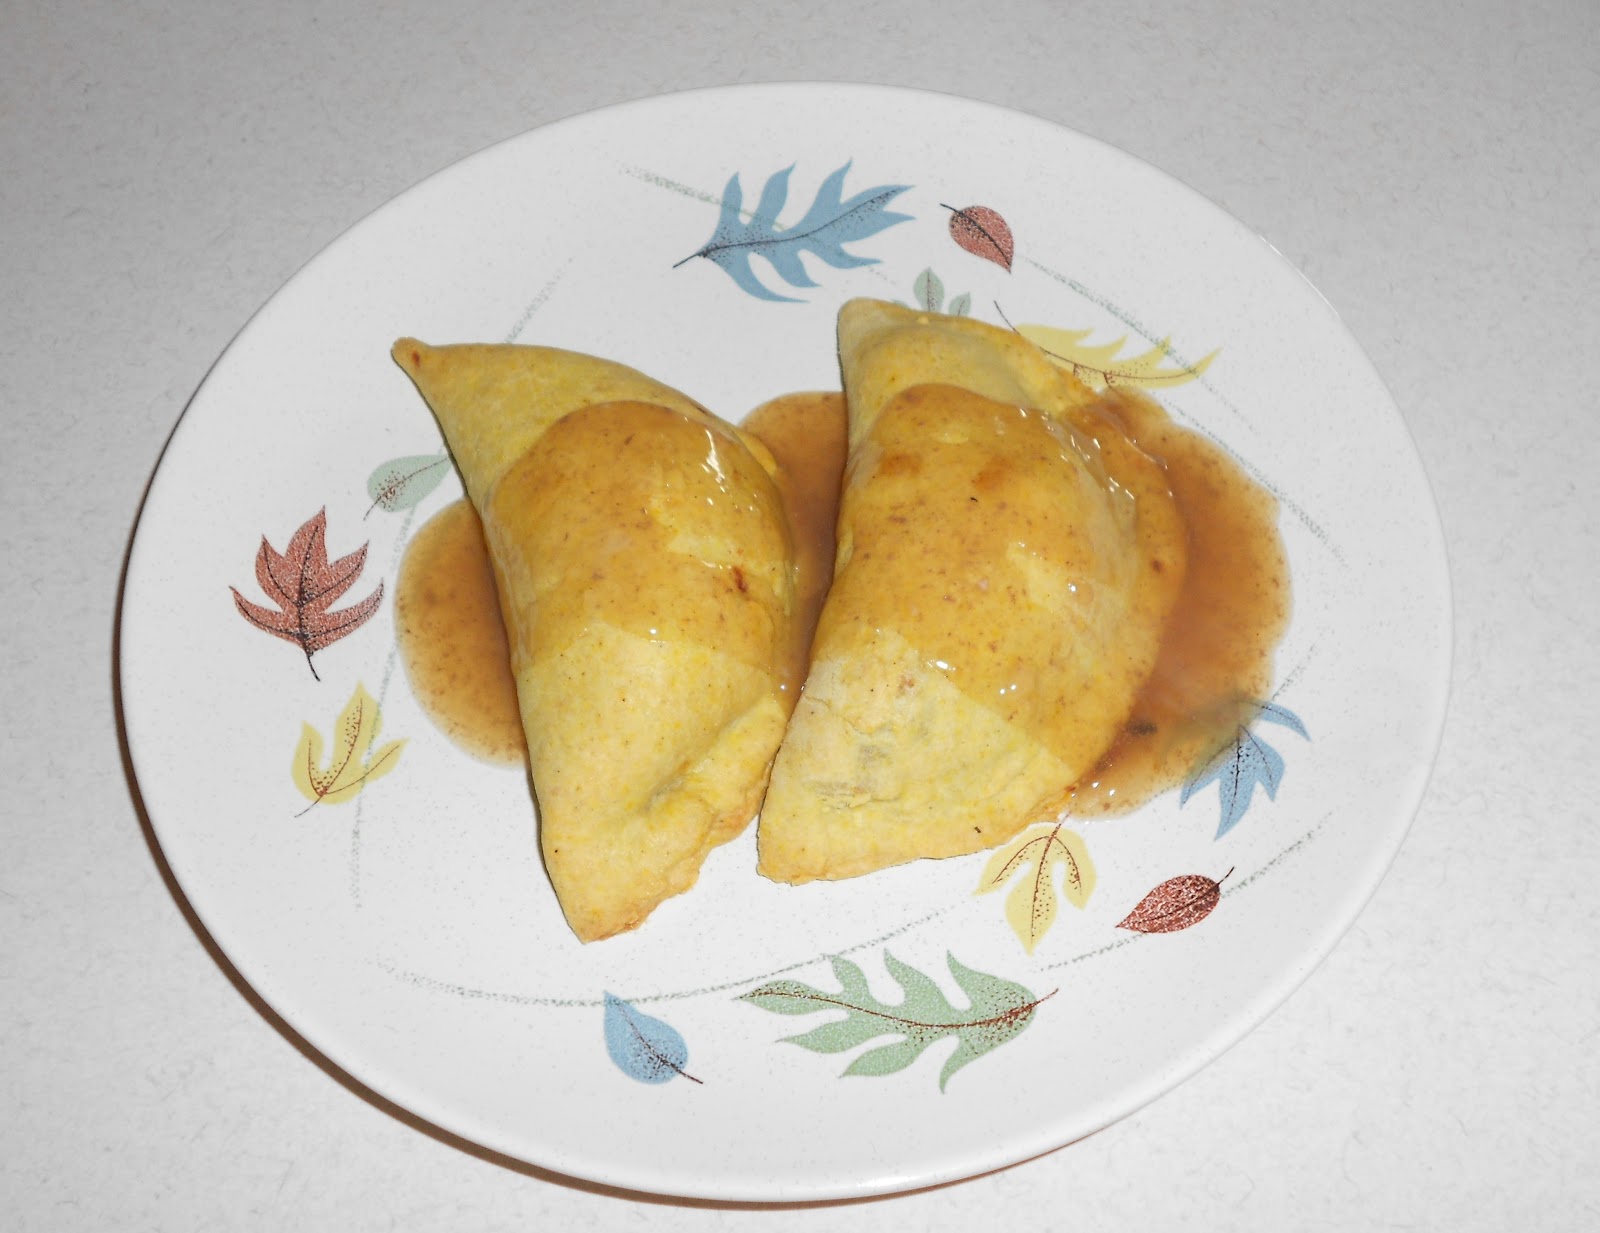
Pasties that I enjoyed growing up, but with a kick.  The crust is golden yellow and the meat inside is spicy.  The Pasties claim to fame is being stuffed with root vegetables – something the Jamaican Patties lack.  So I decided to combine the two and give Indiana their official meat pie which I am calling the Hoosier Pattie!

I started with a recipe for the Jamaican Patties crust which is very similar to pie crust dough with the addition of curry powder, mostly for color, but it does influence the dough’s flavor.  For the filling I decided to mimic the Michigan Pasties with an Indiana twist.  Instead of using beef, I decided to use Indiana’s other white meat, shredded pork.  I kept the root vegetables of the Pasties with the addition of what Indiana is famous for – Corn! 

This was my first time even making pastry dough and I believe I did a bang up job!  It was great having the smell of my Hoosier Patties fill the house, actually aroma coming from the oven – that’s right, I broke down and bought a new range.  It has not been fun trying to create ideas for the blog or even cook dinner without an oven – it has been over three months!  My new range has a five burner cook top and a larger oven, with the broiler in the oven – not some little drawer underneath.  I went with black this time instead of the cream/beige/almond color of the old one.  I was lucky to find that the back of the cream dishwasher panel was black – so now they match (except the refrigerator, but I am working on that).

Sorry, I got sidetracked – here is the recipe for what I am sure will be the World Famous Hoosier Pattie, so enjoy!

Hoosier Patties
For Dough:
4 Cups of All Purpose Flour
1 Tablespoon of Curry Powder
½ teaspoon of Salt
½ Cup of Butter Flavor Crisco
½ Cup (1 Stick or 8 Tablespoons) of COLD Margarine
1 Cup of Icy Cold Water
1 Egg

For Filling:
1 lb of Pork Loin
2 Medium Golden Yukon Potatoes
1 Large Onion
2-3 Stalks of Celery
1 14 oz. can of creamed corn
2-3 Carrots
1 Large Turnip
2 cans 14 oz. of Beef Broth
Salt & Pepper to taste
Water
Corn Starch

Diced all your vegetables and place all ingredients for the filling in your slow cooker.  Cook on High for 4 to 6 hours.  Once your meat is cooked, remove and shred.  Strain vegetables, retaining the broth (you can use this to make gravy for your patties).  I then put my vegetables in a large bowl and with a potato masher mix the veggies, then added the shredded meat, salt and pepper to taste.  I then put my reserved broth in a pot on the stove to boil.  Once it was boiling, I added a rue of water and corn starch to make my gravy.

For the dough - In a Large bowl, sift together the Flour, Curry Powder & Salt.  With a pastry blender cut in the Crisco and margarine until the dough is crumbly.  Slowly add water and mix just until the dough forms – do not overwork (you may not use all the water).

Roll dough on a floured surface to 1/8” thickness.  Cut dough into 8” diameter circles – cover with plastic wrap or waxed paper until you are ready to assemble the patties.  Preheat your oven to 400 °F, line your cookie sheets with parchment paper or you will have to grease your sheets.  (I used my stoneware which worked great – I just have to put them in the oven while it is preheating).

Now place 2-3 Tablespoons of the meat/veggie mixture in the center of each pastry circle.  Moisten the edges with water and fold in half, sealing the edges with a fork.  Mix I egg with 1 Tablespoon of water as a wash for the finished patties.  Bake 20-30 Minutes until patties or golden brown.  Makes about 20 patties.

Until next time – Keep your Foodie Fluids Flowing, and AG Me On!

Photobucket

Monday, May 28, 2012

How to make an easy dessert - Triple Berry Pie

Memorial Day kicks off the official start of Summer!  Outdoor activities, parties and cookouts – that is what I love about Summer.  Here in Indianapolis the Memorial Weekend always starts out on the Friday before with the 500 Festival Memorial Service on Monument Circle to honor our fallen soldiers.  Usually I am working this day, but a couple of years ago my friends from Oregon were in town for the race and I was able to take the day off.  Being that they both are in the National Guard, they wanted to make sure that we all took the time to attend the Memorial Service.  It was such a moving experience especially with the military funeral Cortège and the ceremonial flyover that one could not help but be touched emotionally.  So now if I cannot get the time off, I at least listen to the service on the radio.

Gov. Daniels speaking to the crowd at the 500 Festival Memorial Service
It almost seems like a tradition to have a cookout this weekend, so with friends in town we decided to have an all out Back Home Again in Indiana party.  We had the standards; hotdogs, hamburgers, chicken and all the side dishes including corn on the cob (see my 5/14/12 posting).  With all this food we could not skip the dessert – that would be unAmerican!  When having a cookout, you can have something as simple as watermelon slices or you can get more elaborate and make homemade banana pudding – Yum!  My favorite is a very simple berry pie recipe – easy to make and always wows my guests.  A nice light and cool dessert for those hot Summer days.
 
Above the Triple Berry Pie is my creation wtih
Peaches, Mandarin Oranges & Strawberries

My first encounter with this pie was back home in Michigan – My parents were having a cookout and Mom had this Triple Berry Pie for dessert.  We all were complimenting on how great this pie was.  I thought that Mom bought the pie from work (she worked for Elias Brothers Big Boy restaurant) which she often did.  When I asked her about the pie I was surprised to find out she made it herself.  So of course I had to have this recipe and was amazed to find out that it only took minutes to prepare. 
Triple Berry Pie
·         1 ½ cups of raspberries
·         1 ½ cups of strawberries (sliced)
·         1 cup of blueberries
·         1   3 oz. package of Strawberry flavored gelatin mix
·         1 baked pastry shell or pre-made graham cracker pie shell
·         ¾ cup sugar
·         3 tablespoons of cornstarch
·         1 ½ cups water
·         Cool Whip or your favorite whipped topping

Place berries (or other fruit) in a medium bowl and place in the refrigerator.  Mix the sugar and cornstarch in a medium sauce pan.  Gradually stir in the water until smooth.  Stirring constantly, bring to a boil over medium heat and boil for one (1) minute – the mixture will thicken and get semi-clear.  Remove from heat and stir in the gelatin until it is completely dissolved.  Pour gelatin mixture into the bowl containing the berries.  Once berries and gelatin mixture are combined, pour into your pie shell and refrigerate.  Once pie has set, slice and serve with your favorite whipped topping.

You don’t have to wait until berries are in season to enjoy this recipe – you can substitute frozen berries with the fresh – you just need to thaw it a little.  The colder the fruit mixture the quicker the pie sets.  I have even gotten adventurous and used different varieties of berries and fruit with different flavors of Jell-O.  I have often used orange gelatin with frozen peaches and mandarin oranges, so don’t be afraid to mix it up a little.  Use flavor combinations that appeal to your taste buds.  I have taken these pies to many potlucks and dinner events and they are always a hit.  Drop me a note and let me know what you have come up with yourself.

Until next time – Keep your Foodie Fluids Flowing, and AG Me On!

Photobucket

Monday, May 14, 2012

Corn on the Cob – Grilled or Boiled?

I grew up in a home that the only way you cooked corn on the cob was on the stove in boiling water.  It wasn’t until I moved down here to Indiana that I first enjoyed a cob of corn fresh off the grill – it was the best and I won’t fix it any other way to this day.  Now those of you following my blog know that both my gas oven & grill have decided to call it quits.  I have not yet had the repairman over to look at the oven, but I did manage to get out and purchase a new grill.  We decided to downsize, only 3 burners this time and no side burner – I never used it anyway.  So with Summer just around the corner and this being RACE Month, I decided to share with you a unique way of preparing this famous picnic side dish – the Corn on the Cob.

Trying to come up with a unique way to prepare this Indiana favorite food, I remembered a visit we made to a friend of ours out in Oregon.  Amy (our friend) was very anxious to show us her new hometown of Hood River, Oregon.  It is a small community on the Gorge that is very conscious of sustaining the environment and as any community, loves it festivals and town celebrations.  It was during one of these celebrations that Amy introduced us to a new way of eating corn on the cob – with chili powder and crème fresh.  It was out of this world – spicy, creamy and crunchy all at the same time.  It was great trip, and we loved all the new food experiences we had.

Getting back to the blog…I remembered seeing a Paula Deen show with her using chili powder on grilled corn.  So I searched it out and not only found that recipe, but also one with BACON.  Now my mouth is watering!  So I thought to myself, why can’t I have it all?  Just combine the two recipes into one.  Just as a T-shirt of mine says, “There is more than just corn in Indiana.  We have soybeans and hogs too!”  So I see no problem with me combining two of the three – corn & hogs (bacon that is).

Indiana’s Own – Corn on the Cob

You will need:
·         6 – 8 ears of corn
·         ½ Cup of Mayonnaise
·         1 Cup shredded Parmesan Cheese
·         Chili Powder
·         1 Pound of Bacon
·         Ground Pepper

You can do this either of two ways – In the husk or wrapped in aluminum foil. 


Preheat your grill to about 350°F.  Gently pull back the husk exposing the corn – if you are using foil, remove husks.  Remove the corn silk – use a small brush to make sure all the silk is removed.  Soak the corn with the husks in cold water for about 30 minutes.  Those using foil can skip to the next step.  Now using a basting brush – brush a thin layer of mayonnaise on the corn.  Next, sprinkle with the Parmesan Cheese, Chili Powder and Pepper.  Then wrap a piece of bacon around the corn.  Now either fold back the husks, covering the corn and secure with butcher string or wrap each cob in aluminum foil.  Cooking times will vary depending on your methods – Husks about 15 to 20 minutes; Foil about 10 - 15 minutes.  Either way turn occasionally until bacon is cooked and the corn is tender.  
Note: I used those small frozen cobbets – I just made sure that they were thawed before I started to prepare them.

Well, I have let you know that my preference in cooking Corn on the Cob is on the grill – now you let me know how you like your corn best; Grilled or Boiled?  If you said boiled I believe this recipe will change your mind.  Get out this coming weekend and treat yourself to this outrageous Corn on the Cob. 

Until next time – Keep your Foodie Fluids Flowing, and AG Me On!

Photobucket

Monday, April 30, 2012

Grilled Peanut Butter Egg & Cheese Sandwich


That’s right!  It’s no typo or misprint. In honor of Grilled Cheese Month, I am sharing with you one of my favorite comfort food sandwiches.  Now before you say “Eww”, “ Yuck” or whatever the explicative may be – I just want you to hear me out.  I came across this combo by accident or it might have just been out of convenience.  You see, on the weekends I love to have a hot breakfast.  I never seem to be able to get up early enough during the week (and the older I get, I find it even more so). So on the weekends I treat myself to a nice hot breakfast which usually consists of a fried egg with cheese – cheese makes everything better. And I fix myself toast with peanut butter (if there is any left).  You see, I live with a person who is very finicky on what peanut butter they eat – only Jiff Crunchy.  I thought that if I bought myself any other brand or even Jiff Creamy I would not have to worry about mine getting used up.  Wrong – seems the only time they are finicky about their peanut butter is when it is in the pantry.  Once theirs is gone – anything goes!

Back to the sandwich.  One morning I was making my weekend breakfast and did not realize that it was later than I had thought – I had an appointment to get to.  I still wanted my eggs and toast, but needed to eat it fast.  So, I decided that I would just put the egg on my toast and make a breakfast sandwich for the road.  Well this out to be a brilliant idea and the flavor was an unexpectedly delightful taste treat! (Only bad part was the crumbs and dripping everywhere). Don’t eat and drive – it just is not worth it! This is a stay-at-home treat to savor.  But this new discovery was worth my dry cleaning bill!

The hot egg melted not only the cheese, but also the peanut butter which created a rich sauce which to my surprise really complimented the egg and cheese.

Grilled Peanut Butter, Egg & Cheese Sandwich

You will need per sandwich:

·         2 – Eggs
·         1 – 2 slices of Mild Cheddar cheese
·         2 slices of bread
·         Peanut Butter
·         Butter

In a frying pan melt a small pad of butter (or a small amount of Olive Oil).  Fry your eggs as you like them (I prefer Over Medium – I like a slightly running yoke).  When you egg is done, remove from heat and top with a slice of cheese and set off to the side until we are ready to marry with the bread.  Now butter one side of each of the slices of bread.  Note: I use a cheese bread from a local bakery – it is a heavier, stiffer bread.  I try to staff away from those soft breads.  Place in your frying pan over Medium heat – adding peanut butter to one slice and your second slice of cheese to the other slice of bread.  Use a spatula to check the buttered side of the bread to make sure it doesn’t burn.  When the bread is toasted nicely, slide your egg onto the cheese topped slice and using your spatula top with the peanut butter bread slice.  Remove from heat, add to your plate and enjoy!  It is great with a large glass of ice cold milk!

Whenever I share this with friends, they call me crazy.  I tell them that I am – crazy about food and “don’t knock it until you tried it”.  I hope you will try this and share it with you family and friends.  Let me know of some of your “crazy” food mixups – I am curious to hear what you have come up with yourselves.

Until next time – Keep your Foodie Fluids Flowing, and AG Me On!

Photobucket

Monday, April 16, 2012

How to cook the best Sauerkraut in the World…

Well at least per Uté (Ooo-tah) Hiltman.  And who is Uté Hiltman?  Well back in 2001, we had the opportunity of hosting a foreign exchange student from Germany – and you guessed it, she was Uté.

Having her as part of the family for just 8 months, we wanted to give her as many of our American culture as we possibly could.  We brought her up to Michigan (my home State) for my Sister’s wedding and during the week we managed to go to Mackinaw Island, cross over the “Big Mac” bridge and spent to wonderful day enjoying Cedar Point.


My family! (In back, left to right) Kami, Ute' and Jim (Front) Amy, Alex and Me

While Uté was enjoying life and school here in Indianapolis, I did not want her to feel too homesick.  So I decided to make dinner one night that I believe every American thinks is a German favorite, Sauerkraut and Kielbasa (of course the kielbasa is Polish, but the sauerkraut is definitely German).  I prepared the dinner just as my Mom did when we were little, cooked all day in the crock pot, with her secret ingredient.  When it came time for dinner, Uté asked what we were having.  I was shocked to find out that she did not like sauerkraut!  I thought every one back in Germany loved sauerkraut.  She said that her Mom did make it a lot, but she never acquired the taste for it.  A little disappointed, I urged Uté to at least put a little on her plate to try – if she did not like mine she did not have to eat it.  So we all filled our plates and made our way up to the loft (where the TV is – we wanted to make sure she experienced the American way of eating dinner: in from of the TV!) and we all ate our dinner.  Now I love my sauerkraut and kielbasa – it is one of my favorite things to eat, especially the leftovers, so I really wasn’t paying attention to what Uté was eating on her plate.  We all finished and Uté (being a very polite and courteous young lady) took all our plates downstairs to the kitchen.  When she returned back upstairs, she had another plate filled with more sauerkraut and kielbasa.  I looked at her surprised and she said, “This is sure better than what my Mom makes” and finished her second plate.  I told her it was my “secret” ingredient and laughed.

It was about a month or so I decided to make this dish again for dinner, but this time I just made it quickly on top of the stove.  As I was putting all the ingredients into the pot, Uté came into the kitchen just as I had cracked open a beer and started pouring it into the pot.  “Now I know why I like your sauerkraut”, were the words that came out of her mouth.  It hit me funny and snickered.  She was going to make sure she told her Mom when she got back to Germany about my “secret” ingredient.


I made sure Ute had the recipe to share with her Mom and now here it is for you to enjoy also.  My “American” recipe for Sauerkraut and Kielbasa.

·         2 – 32 oz. jars of Sauerkraut
·         2  - 14 oz. packages of Turkey Polska Kielbasa
·         2 ½ cups of packed Brown Sugar
·         2 to 3 Tablespoons of Red Hot (omit if you don’t like the slight heat0
·         2 – 12 oz. bottles (or cans) of your favorite beer
·         Black Pepper to taste


Rinse and drain the sauerkraut in a colander.  While the sauerkraut is draining, slice the kielbasa links into ½” slices.  Put the kielbasa slices in a large skillet and brown.  (I had some bacon grease left over and adding a tablespoon for extra flavor.)  I squeezed the sauerkraut to get out all the juices and dumped into my slow cooker.  I then add the brown sugar, hot sauce and beer.  I used an Indiana Beer from Upland Brewery – try something different.  Again, make sure you are cooking with a beer you enjoy to drink – it makes all the difference.  Stir your ingredients all together and add the browned kielbasa.  Pepper to taste and set the slow cooker on High for 4 to 6 hours.  The longer you cook this dish, the deeper the flavors are.

We had such a wonderful experience with Uté and I know she loved her Indiana home.  I cannot help but remember that time when Uté “caught” me pouring beer into my sauerkraut – she was so surprised and I have a heart warming memory!

Until next time – Keep your Foodie Fluids Flowing, and AG Me On!

Photobucket

Monday, March 26, 2012

How to Bake a Cake without an Oven!

I still have not seen the repairman to fix my oven, but I am up for any challenge!  Well I have taken my first “AG”venture – to the small town of Medora, Indiana for the National Maple Syrup Festival.  I was asked to participate in the Judging of their Sweet Victory Challenge for the adult dessert competition.  It was about a two hour drive from Indianapolis to Medora and it was a nice sun shiny Saturday as we traveled through the curves & hills of Southern Indiana.  I arrived early and caught a shuttle to Burton’s Maplewood Farms.  Once there we walked the Maple Sugar Trail and along the trail they had set up a demonstration on making maple sugar.  We learned that early settlers were not interested in making sap from the maple tree into syrup – since they did not have refrigeration; they had no means to store syrup.  Instead, they boiled the sap down even further, to make maple sugar.  This staple could then be stored for long periods of time.  Maple sugar was used as a sweetener and could easily be converted back to syrup.
We made our way over to the Sugar House where sap that had been collected from the maple trees was boiled down to maple syrup.  Here we were able to taste some of the syrups that Burton’s Maplewood Farms was making.  We tried the “early harvest” syrup that was light in color with a lightly sweet maple flavor.  Then they gave us a sample of the “late harvest” syrup – it was much darker in color and very rich in maple flavor.  However my favorites were their syrups that Burton’s have aged in oak barrels.  They are aging syrup in Rum, Bourbon and Brandy barrels – these are amazing infused maple syrups, a must try in my book.

After our visit to the farm, it was back in town to judge the adult dessert flight.  We had three desserts to judge on appearance, use of products (the Maple Syrup & King Arthur Flour) and of course taste.  It was a great experience and gave me the inspiration for a cake I am sharing with you.  I wanted to give you a dessert with Maple Syrup and I still have no oven!  So I packed up my supplies and headed to my Sister-in-Law’s to bake this cake.  Enjoy!

Lazy Daisy Oatmeal Cake – Maple version.  Taken from the book, “Home on the Farm, If Chickens Could Talk” written by Lorene McCormick Burkhart.


FOR THE CAKE:
·         1 ¼ cups boiling water
·         1 cup oats (quick or old fashioned)
·         ½ cup butter, softened
·         1 cup granulated sugar
·         ½ cup shredded coconut
·         1 cup firmly packed brown sugar
·         1 teaspoon vanilla
·         2 tablespoons of pure maple syrup
·         2 eggs
·         1 ½ cups sifted all-purpose flour
·         1 teaspoon baking soda
·         ½ teaspoon salt
·         1 ¼ teaspoon cinnamon
·         ¼ teaspoon nutmeg 
FOR THE FROSTING:
·         ¼ cup butter, melted
·         ½ cup firmly packed brown sugar
·         3 tablespoons half& half
·         1 ½ tablespoons of pure maple syrup
·         ¾ cup shredded coconut


For cake, pour boiling water over oats; cover and let stand for 20 minutes.  In a large bowl, beat butter until creamy; gradually add sugars - beat until fluffy.  Now blend in the vanilla, maple syrup and eggs.  Add oats mixture and coconut, mix well.  In another bowl sift together the flour, baking soda, salt, cinnamon and nutmeg and blend into the creamed mixture – mix well.  Pour batter into greased and floured 9-inch square pan and bake in a pre-heated oven at 350 degrees 40-50 minutes. Do not remove cake from pan.  For the frosting, combine all ingredients.  Spread evenly over cake.  Broil until frosting becomes bubbly.  Cake can be served warm or cold.


It's me in the middle - 3rd from the left.


I hope you all enjoy this cake – the frosting is to die for!  Next year you really need to check out the National Maple syrup Festival, it is an enjoyable and educational event for the whole family.  You may even want to try your hand at entering the Sweet Victory Challenge – if so I will be there to Judge!

Don’t forget to “AG Me On! – I am still looking for challenges or places for a new “AG”venture.  Until next time – Keep your Foodie Fluids Flowing, and AG Me On!

Photobucket