Showing posts with label Milk. Show all posts

Monday, April 30, 2012

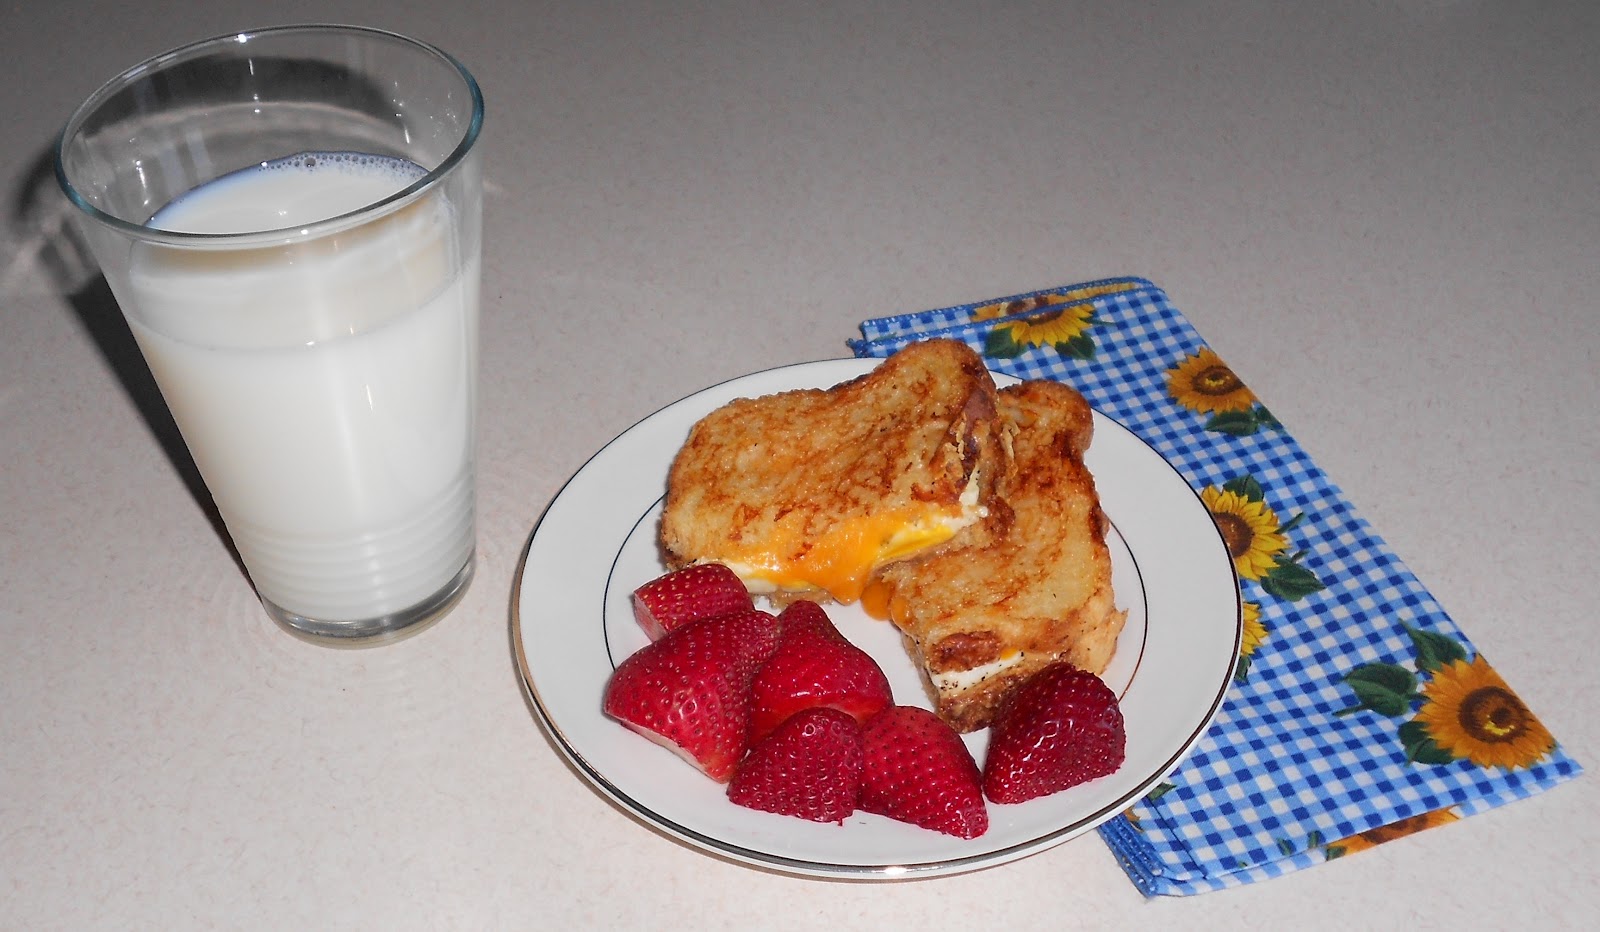
Grilled Peanut Butter Egg & Cheese Sandwich


That’s right!  It’s no typo or misprint. In honor of Grilled Cheese Month, I am sharing with you one of my favorite comfort food sandwiches.  Now before you say “Eww”, “ Yuck” or whatever the explicative may be – I just want you to hear me out.  I came across this combo by accident or it might have just been out of convenience.  You see, on the weekends I love to have a hot breakfast.  I never seem to be able to get up early enough during the week (and the older I get, I find it even more so). So on the weekends I treat myself to a nice hot breakfast which usually consists of a fried egg with cheese – cheese makes everything better. And I fix myself toast with peanut butter (if there is any left).  You see, I live with a person who is very finicky on what peanut butter they eat – only Jiff Crunchy.  I thought that if I bought myself any other brand or even Jiff Creamy I would not have to worry about mine getting used up.  Wrong – seems the only time they are finicky about their peanut butter is when it is in the pantry.  Once theirs is gone – anything goes!

Back to the sandwich.  One morning I was making my weekend breakfast and did not realize that it was later than I had thought – I had an appointment to get to.  I still wanted my eggs and toast, but needed to eat it fast.  So, I decided that I would just put the egg on my toast and make a breakfast sandwich for the road.  Well this out to be a brilliant idea and the flavor was an unexpectedly delightful taste treat! (Only bad part was the crumbs and dripping everywhere). Don’t eat and drive – it just is not worth it! This is a stay-at-home treat to savor.  But this new discovery was worth my dry cleaning bill!

The hot egg melted not only the cheese, but also the peanut butter which created a rich sauce which to my surprise really complimented the egg and cheese.

Grilled Peanut Butter, Egg & Cheese Sandwich

You will need per sandwich:

·         2 – Eggs
·         1 – 2 slices of Mild Cheddar cheese
·         2 slices of bread
·         Peanut Butter
·         Butter

In a frying pan melt a small pad of butter (or a small amount of Olive Oil).  Fry your eggs as you like them (I prefer Over Medium – I like a slightly running yoke).  When you egg is done, remove from heat and top with a slice of cheese and set off to the side until we are ready to marry with the bread.  Now butter one side of each of the slices of bread.  Note: I use a cheese bread from a local bakery – it is a heavier, stiffer bread.  I try to staff away from those soft breads.  Place in your frying pan over Medium heat – adding peanut butter to one slice and your second slice of cheese to the other slice of bread.  Use a spatula to check the buttered side of the bread to make sure it doesn’t burn.  When the bread is toasted nicely, slide your egg onto the cheese topped slice and using your spatula top with the peanut butter bread slice.  Remove from heat, add to your plate and enjoy!  It is great with a large glass of ice cold milk!

Whenever I share this with friends, they call me crazy.  I tell them that I am – crazy about food and “don’t knock it until you tried it”.  I hope you will try this and share it with you family and friends.  Let me know of some of your “crazy” food mixups – I am curious to hear what you have come up with yourselves.

Until next time – Keep your Foodie Fluids Flowing, and AG Me On!

Photobucket

Monday, February 13, 2012

Biscuits fit for the “King”!

This month I am going to dazzle your mind with two great and unexpected recipes using the common biscuit.  My inspiration for this first one is the “King of Rock & Roll” Elvis Presley.  Did you know that February was a very special month for Elvis?  On February 1st in 1968 Elvis became a father when Priscilla gave birth to Lisa Marie.  So my “King” inspired dish de jour is…Elvis’ Biscuits & Gravy.  But first, let me give you some history on a recipe that I believe would even make Paula Deen cry for joy!

For the past 14 years or so my Indiana family (yes, I grew up a Michigander – but I am now a proud Hoosier) has been teasing me with a dish that I really thought they made up, “Chocolate Gravy.”  I had never heard of such a thing before and I even wondered what you would eat it with-- definitely not steak and potatoes.  Well last year, during a family vacation, I found out.  I was awakened to the sounds of breakfast being made and as I made way to the kitchen I was told we were having “Chocolate Gravy & Biscuits” for breakfast.  What a treat!  I watched in awe as they made the gravy and as it was done watched everyone split open their biscuits and dredge them with the savory chocolate liquid.  Now came my turn, don’t get me wrong – I like chocolate, but in moderation.  That was just WAY too much chocolate for me to eat in one sitting.  I thought to myself, what can I do to make this it more to my liking?  I remembered we had a jar of peanut butter in the cabinet (actually there were four jars – everyone had to bring there own on this trip) and I put a generous helping on my open biscuits then spotted the bananas.  Yes, I peeled one and added slices to my creation.  Next of course came the gravy, not too much – I still want to taste the other ingredients.  So on to the breakfast table and as I sat down everyone stopped eating -- looking at my plate wondering, “What did you do?”  They all had to try my new creation; it was an instant hit and a great piece of family history we all treasure.  Jokingly this dish was dubbed – “Elvis’ Biscuits and Gravy.”

Let’s start with the Chocolate Gravy – with these five simple ingredients you will make the most decadent gravy you will ever have.  In a skillet melt 2 tablespoons of butter and add 2 tablespoons of flour to make your rue.  Now over a medium heat, add 1 cup of milk, 1 cup of sugar and 2 tablespoons of cocoa powder.  Continue stirring and simmer until gravy is the right consistency – about 6 minutes.  This will make enough gravy for about 4 servings.  Now you are ready for a breakfast that will have you singing, “You are Always on My Mind”.

Now you will need:
  • Biscuits – I would use your favorite recipe or store bought.
  • Peanut Butter – Creamy or Chunky, your choice.
  • Bananas
  • Chocolate Gravy
Once you have made the gravy and freshly baked your biscuits, split biscuits in two and place on your plate.  Add a generous helping of your choice of peanut butter and top with banana slices.  Now comes the fun part – cover the biscuits with the chocolate gravy.  I will leave it up to you, either just a drizzle or a drench – I prefer somewhere in the middle.

Now share this with someone special – remember Valentine’s Day is coming up!

Until next time – Keep your Foodie Fluids Flowing, and AG Me On!

Photobucket

Monday, January 30, 2012

Chicken Fried Chicken Chili

Hello!  I just want you all to know that I am very excited about “AG Me On!” and hope you will join me in the excitement.  I was overjoyed to be asked to join fellow ISDA bloggers.  I never imagined that I would be part of the blogosphere, let alone have my own blog, just from submitting guest articles and recipes for the Indiana’s Family of Farmers (IFOF) blog.  My name is Dennis Henry - I work for the Indiana Grain Buyers & Warehouse Licensing Agency under the Indiana State Department of Agriculture.  Among my many duties as licensing officer with the Agency, I manage our part of the ISDA website – this is how I became involved in social media.

My hopes for “AG Me On!” are to bring to you recipes with a twist.  Something you have not thought of before, recipes that you just HAVE to try - all focusing on Indiana Agriculture.  Mostly I hope to engage my audience with your ideas, challenges and even bring you all on “AG”ventures to some of Indiana’s great food finds.

When we were brainstorming to start this blog, we went back to what I had previously created for the IFOF blog – “BBQ Pulled Pork Chili” and “Buffalo Chicken Chili.”.  Both of these chilis are must tries in my book!

 OK, now we have our theme for the Month, Chili – now what recipe should I share?  I had so much fun with the BBQ Pulled Pork Chili that I had created last year; I knew I had to keep these creative juices flowing.  Then suddenly it came to me – Chicken Fried Chicken Chili.


Chicken Fried Chicken Chili
·         3 large Chicken Breasts – diced
·         2 medium or 1 large Onion – diced
·         3 JalapeƱos – finely diced (remember to wear gloves)
·         2 – 3 cloves of Garlic
·         2 tablespoons of Chili Powder
·         1 tablespoon of Cumin
·         1 teaspoon of Pico de Gallo
·         1 teaspoon of Cocoa Chile Blend ( a spice mix of Cocoa Power & Chipotle Pepper Powder)
·         2 – 4 oz cans of diced Green Chiles
·         1 – 48 oz jar of Great Northern Beans
·         1 cup of frozen Corn
·         4 cups of Whole Milk
·         2 cups of Chicken Broth
·         Olive Oil

Add one tablespoon of Olive Oil to a large fry pan.  Add the chicken, onion and spices – brown the chicken and add the JalapeƱos and garlic when the chicken is almost done and the onions have started to soften.  In a large pot, combine the milk & chicken broth under a medium low heat (you do not want to scorch the milk).  Add in the chicken mixture and the remaining ingredients.  Simmer until hot, you may also want to put the ingredients in a slow cooker and let is cook that way.  I thickened up the chili with a mixture of water and corn starch.

Now here comes the Chicken Fried part of this dish.  We are chicken frying oyster crackers – yes, oyster crackers.  These came out so good; you may want to use these with other chili and soup dishes.

You will need:
·         One bag of Oyster Crackers
·         3 cups of Cooking Oil
·         ½ cup of Buttermilk
·         1 cup Flour
·         Spices: Salt, Pepper & Chili Powder – to your taste.

In a small pot – heat up the cooking oil – I like peanut oil for this.  Prepare your work area with 2 bowls, 1 containing Buttermilk and the other containing the flour & spices.  Use the assembly line method – dredge the crackers in Buttermilk, then coat with the flour mixture, then deep fry them.  They will only take about 20 to 30 seconds.  Scoop out the deep fried crackers and let them drain on a cooling rack over paper towels to catch extra oil.  Let cool and enjoy with the Chili!

Until next time – Keep your Foodie Fluids Flowing, and AG Me On!


Photobucket